Installation
Installing ExactCAD takes about ten minutes, plus the time it takes us to email your license code back to you. There is no Windows installer. You unzip one package, license it, and point Xpedition at it.
1. Download the software
Download the latest package from the Downloads page. It comes in both .zip and .7z formats, and the contents are the same.
If you have any security issues with the download files, you can also get the downloads from GitHub, here: https://github.com/ExactCAD/download
2. Unzip it to a folder of your choice
Unzip the package wherever you like. We recommend C:\ExactCAD, but any folder works, including a folder on a network drive. If you use a different folder, write down the path, because you’ll need it in steps 8 and 9.
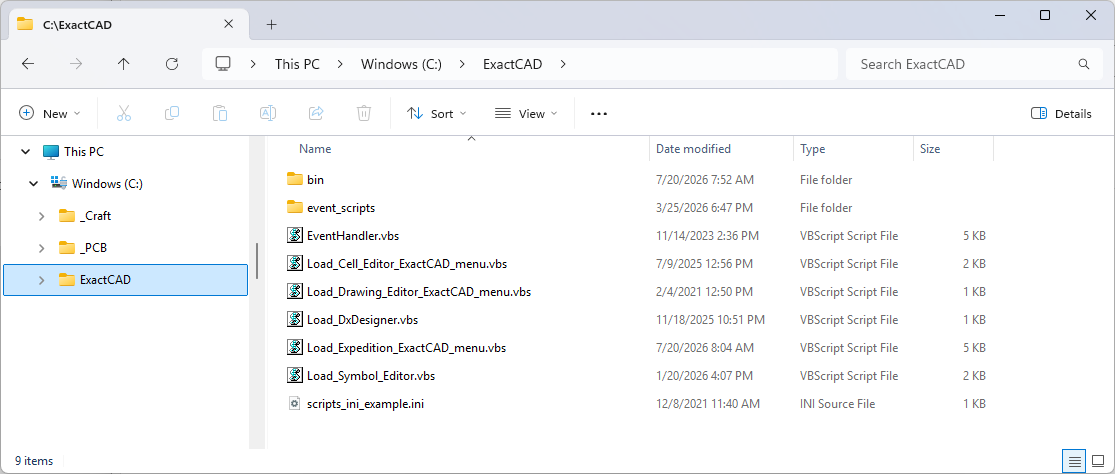
When you’re done, the folder should look like this:
3. Run the ExactCAD Licensing tool
In your install folder, go to bin\exactcad_licensing and run exactcad_licensing.exe.
4. Get your user data code
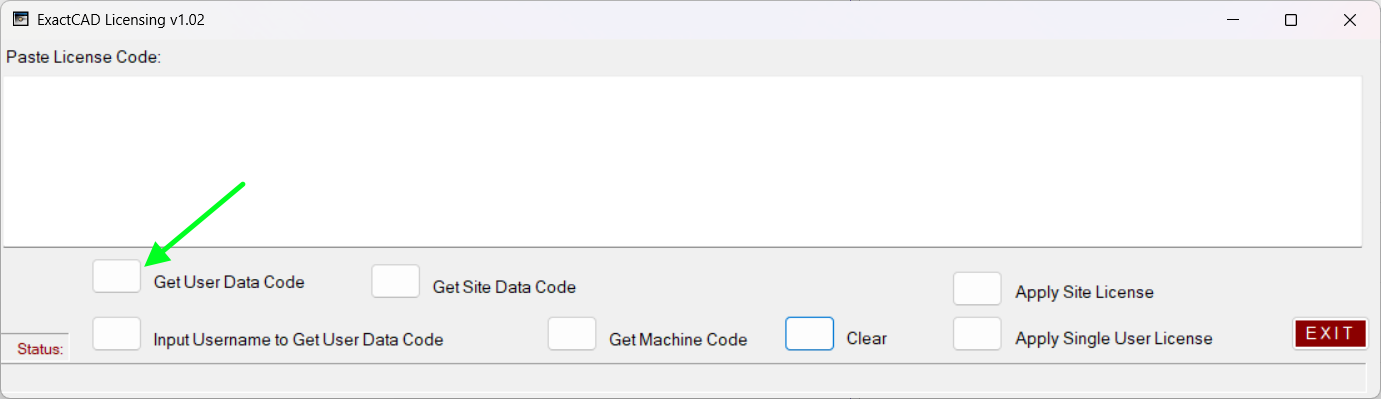
Press the Get User Data Code button. The tool puts your user data code in the text box.
5. Email the code to us
Copy the code, paste it into an email, and send it to exactcad@exactcad.com. Leave the Licensing tool open, or reopen it later. You’ll use it again in step 7.
6. Receive your license code
We’ll create a license code for you and email it back to you.
7. Apply the license
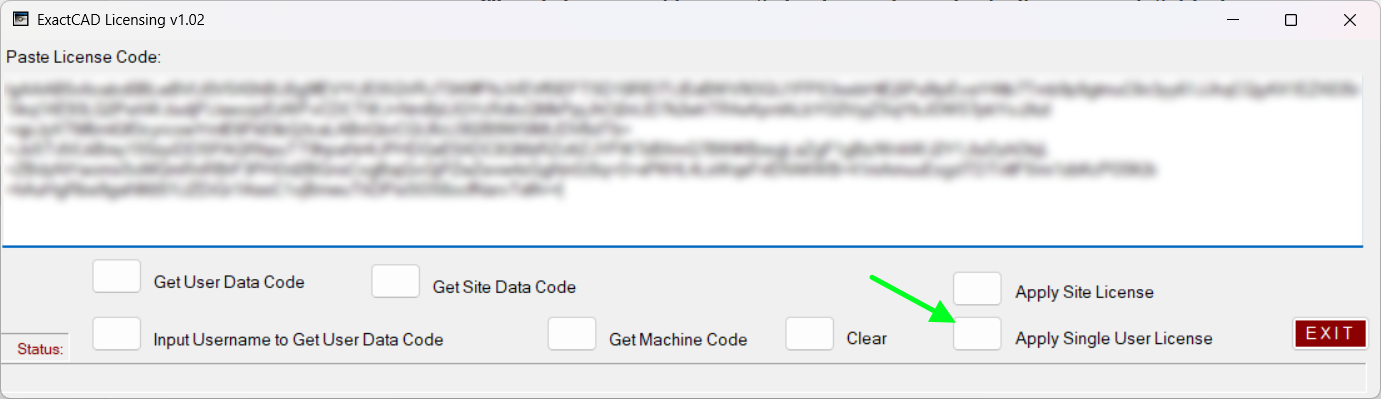
In the Licensing tool, press Clear to empty the text box. Then paste in the license code from our email and press Apply Single User License.
8. Set the EXACTCAD_PATH environment variable
Create an environment variable called EXACTCAD_PATH and set its value to the folder where you unzipped ExactCAD, for example C:\ExactCAD. Note: there is no need to add a backslash "" to the end of the path.
9. Add the ExactCAD entries to scripts.ini
Your ExactCAD install folder includes scripts_ini_example.ini, which has the entries that load ExactCAD.
- If you don’t already have a scripts.ini file, copy the example file into your WDIR folder and rename it to
scripts.ini. - If you already have a scripts.ini file, copy the lines from the example file into your existing file, and renumber the
Script#xvalues so they are consecutive.
If you installed somewhere other than C:\ExactCAD, update that path in the scripts.ini entries as well.
Setups vary a lot from one site to another, so if you’re not sure how to handle steps 8 or 9, email us at exactcad@exactcad.com and we’ll set up a video call to walk through it with you.
10. Restart your computer
Restart so that Windows and Xpedition pick up the new environment variable. When you next open Xpedition, the ExactCAD menu will be in the menu bar.
Need a site license? Contact ExactCAD at exactcad@exactcad.com for information on how to get and install site licenses.
Having trouble? Email us at exactcad@exactcad.com and we’ll help you get up and running.